

This post may contain affiliate links. So when you purchase through these links, I make a small commission. Thank you for your continued support of CFC.

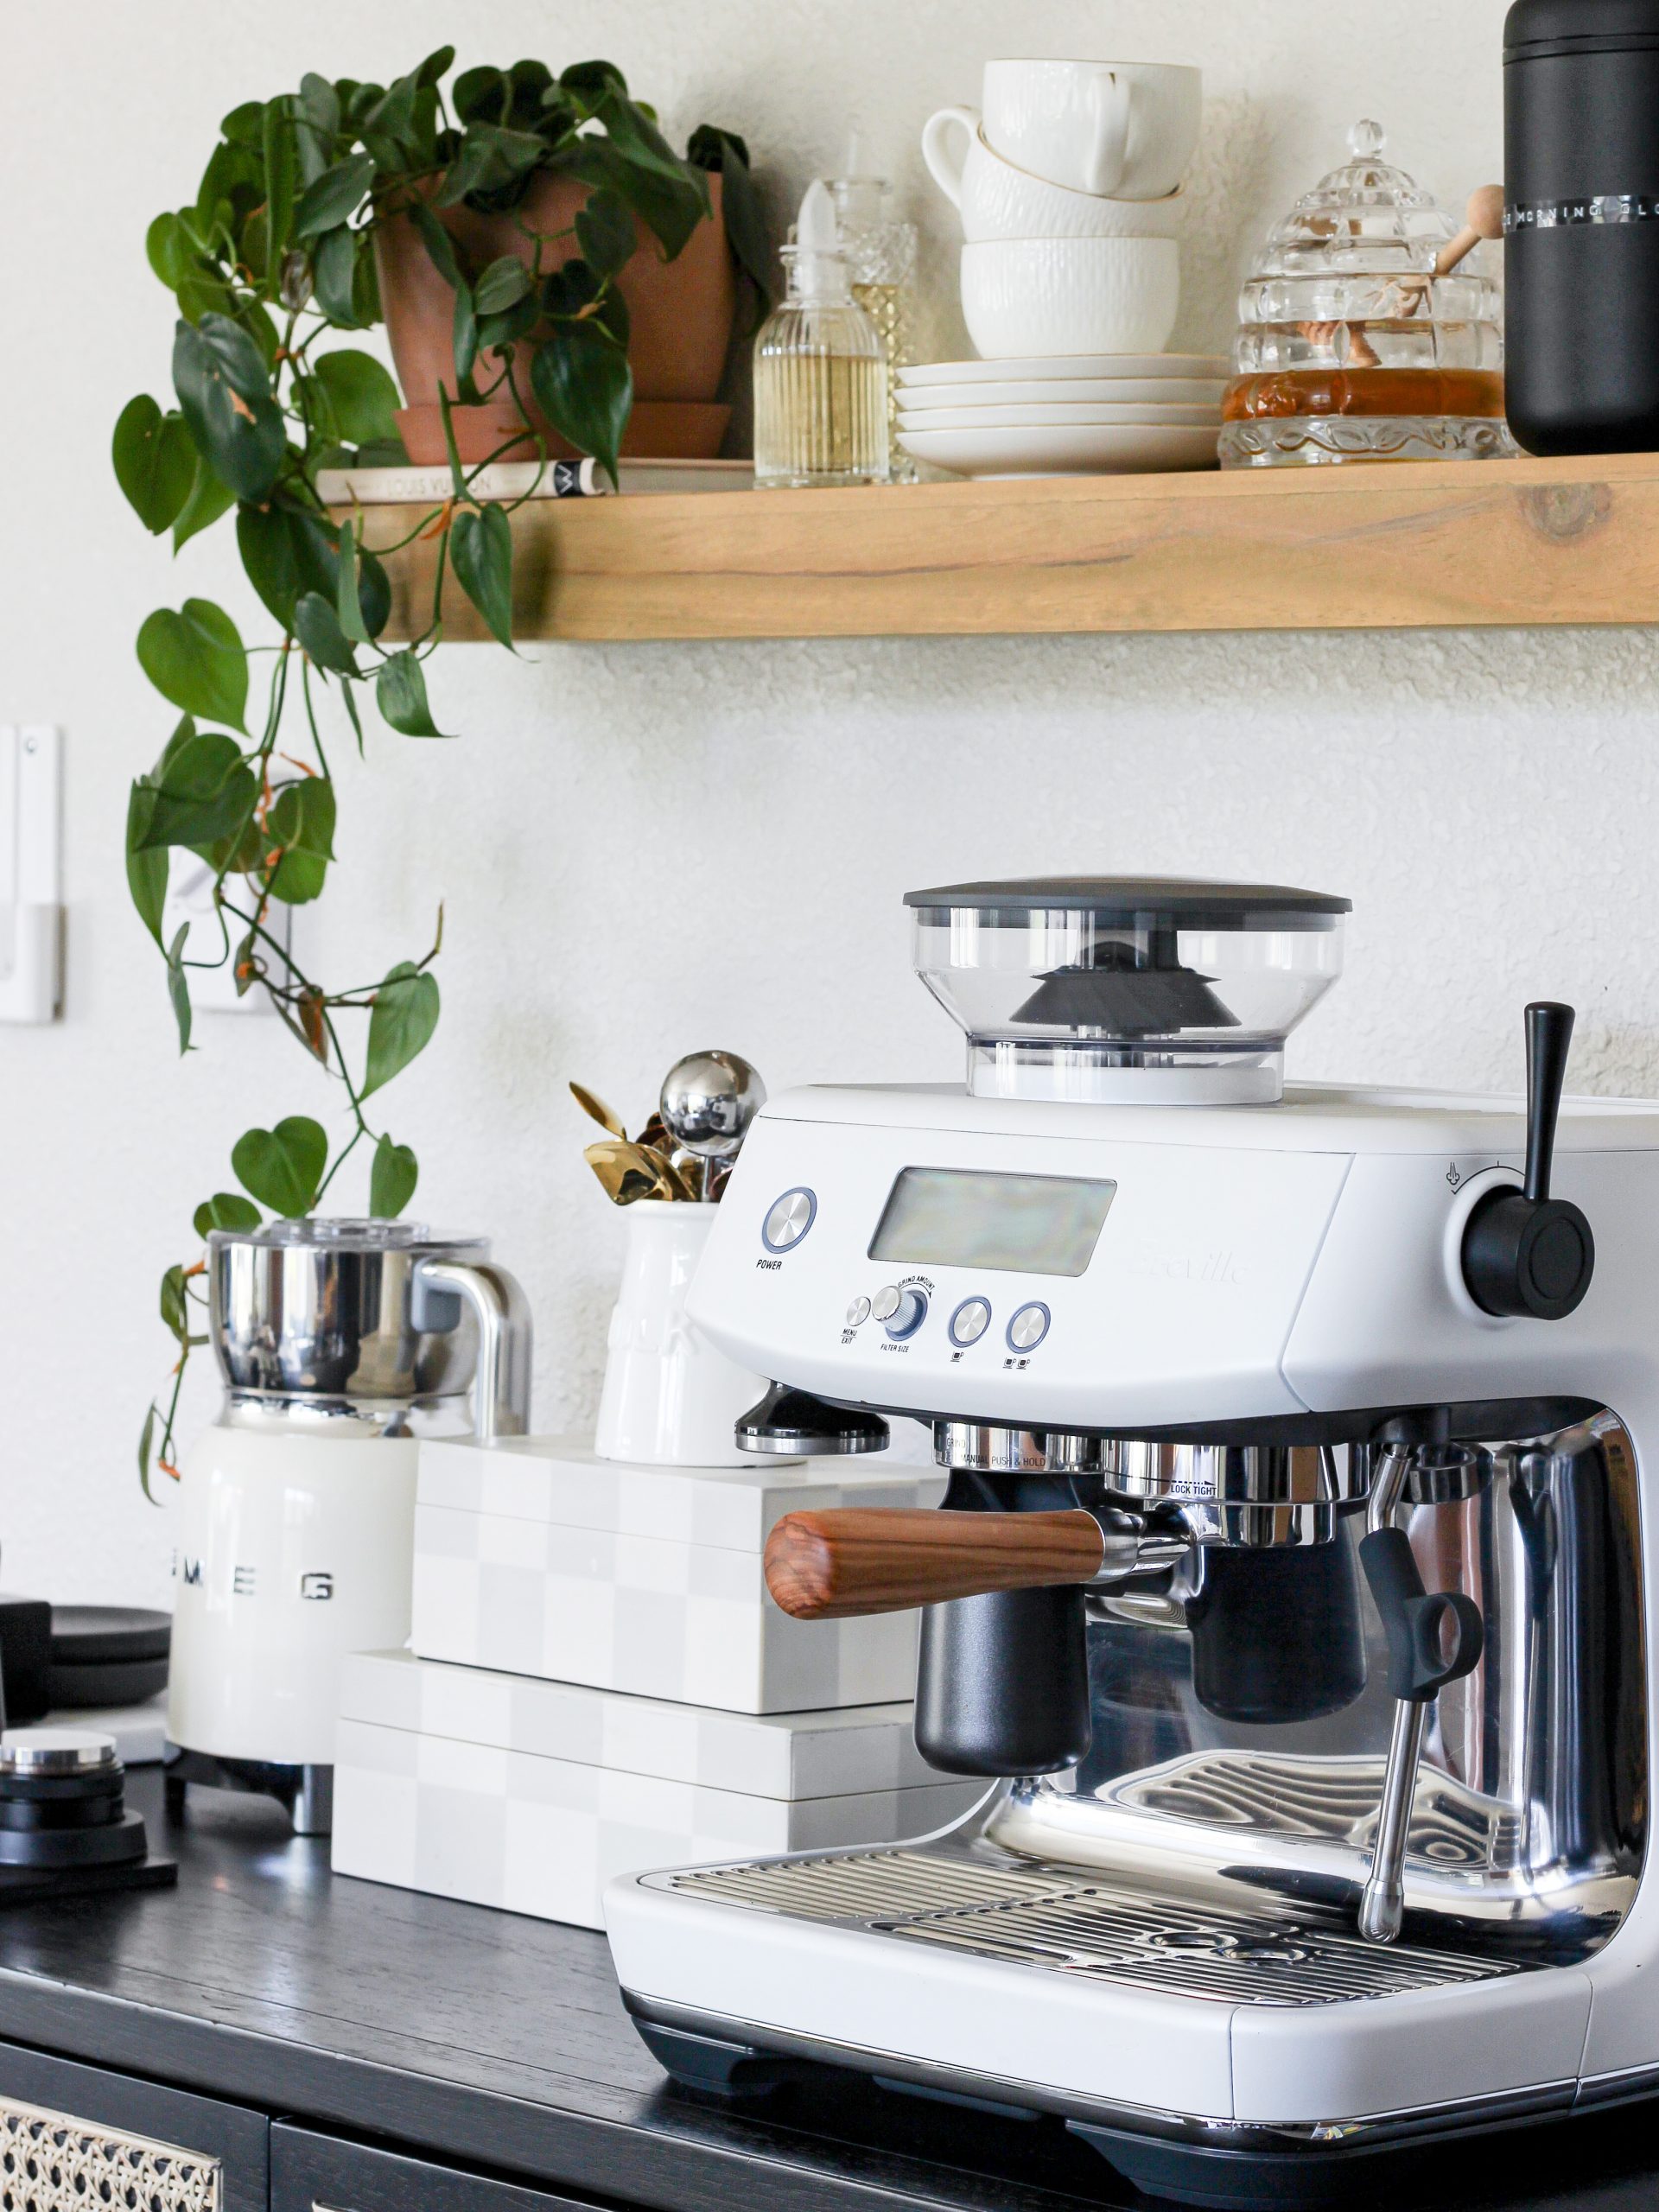
Ok before we get into it, I would like to politely point out I am NOT an expert in espresso making by any stretch of the word. I’m just a bit bougee and enjoy a good cup of coffee so I decided to learn how to make better coffee at home. I fell in love with making espresso during the pancetta in 2020. And it has been absolutely amazing! So today, I am going to take you through a tour of my coffee bar and share a step by step “how to make espresso” guide.
I’m writing this post for all my fellow boujee bitches who find joy in aesthetically pleasing, yet very functional pockets of their homes. And of course, to my coffee loving girlies, this is for you too. Wink wink.
Y’all asked, here’s everything you need to make espresso at home:

My machine, the Breville Barista Pro. For a full review on this machine, CLICK HERE to watch Lifestyle Lab’s review on youtube. This review was the one that made me decide on this machine as a starter.

My Scale: The Acaia Lunar Scale. You really don’t need this scale. I like it because it has an automatic built in timer. But I rarely use that function because the barista pro already has a timer. So, here is a list of others I love that are more affordable than the one I have:
- The TIMEMORE coffee scale comes with a timer. I don’t think it’s automatic like the one I have, but very convenient with great reviews.
- The GREATER GOODS pocket scale is actually the one I had before my current one and its great.


Dosing Cup and Dosing Funnel. If you’re using the Breville barista pro, I would recommend a dosing cup or a dosing funnel. A dosing cup allows for easy weighing of your coffee beans and a tidy transfer of the coffee from the grinder to the protafilter. Now, I have both a dosing cup and funnel. But, you can get away with just having a dosing funnel and grind your coffee right into the protafilter.
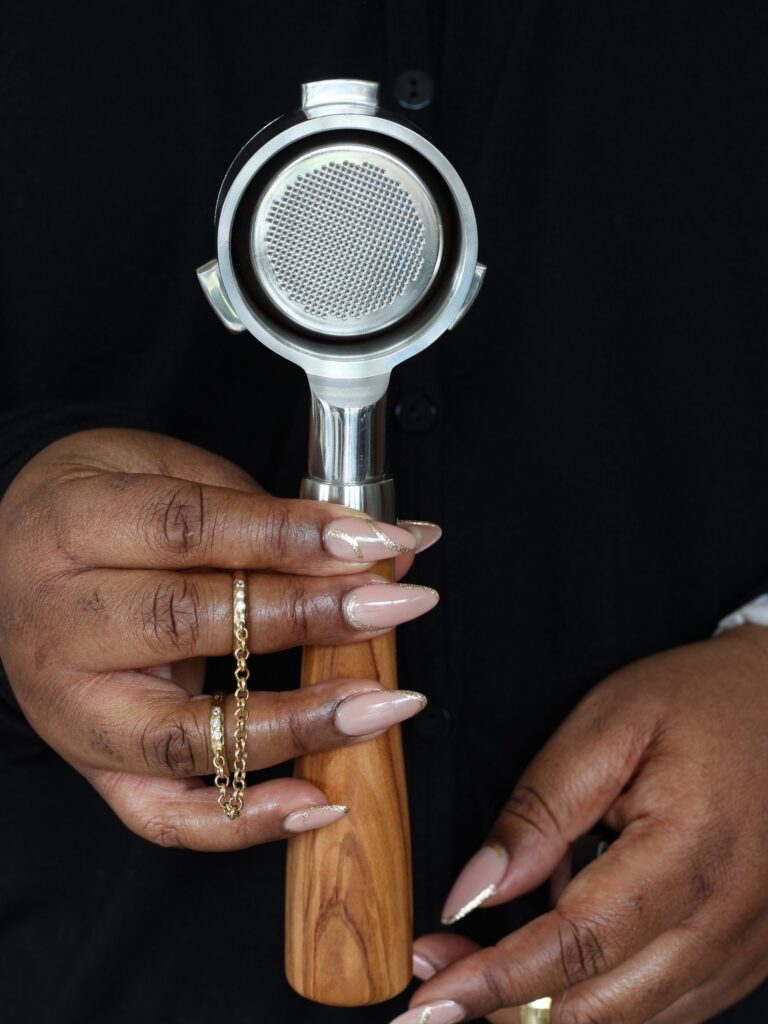
Bottomless Protafilter. The Breville barista pro already comes with a protafilter. But, I highly recommend getting yourself a bottomless protafilter. I mean the thing is just a whole lot sexier, but that’s not all. A bottomless protafilter will help you learn more about your shot. Because there is no spout in the way, it’s easier to see what is going wrong or right with your shot.

The WDT (Weiss Distribution Technique) tool is the unsung hero in this process. It’s basically little tool with very fine needles that breaks up any clumps in your coffee grounds.
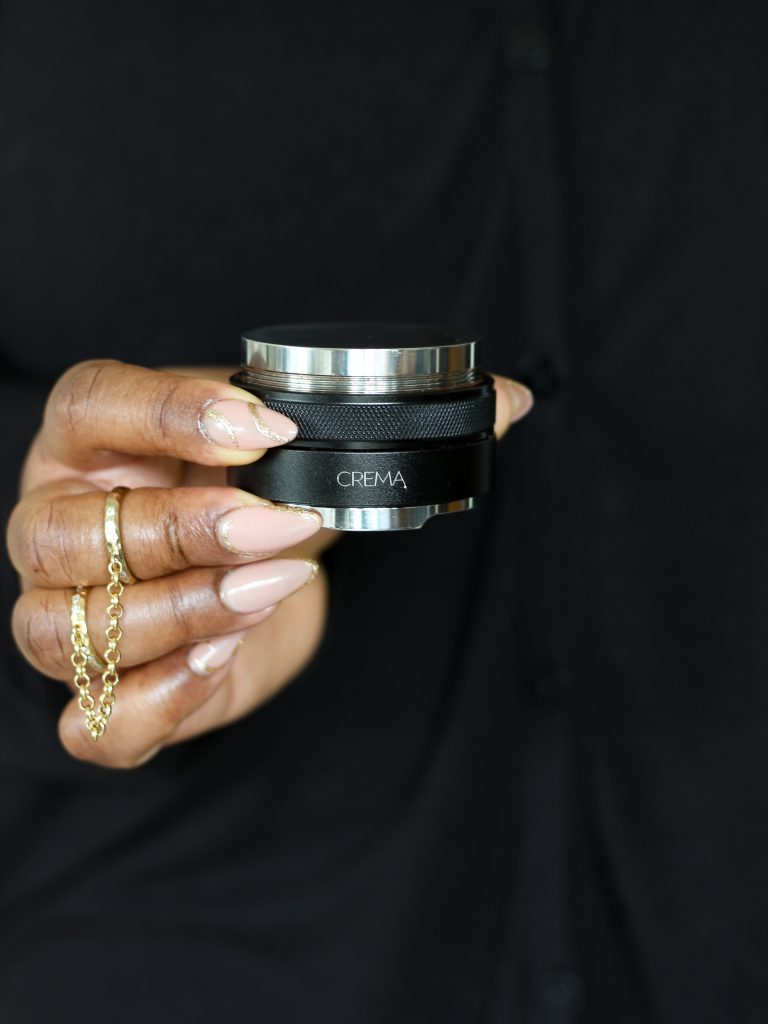
Crema’s Distributor and Tamper combo. I love this thing! The distributor side levels the grounds before tamping. The tamper is used to pack the grounds down evenly to get a quality shot. Making sure your tamp is consistent from shot to shot is very important to making a great cup of espresso. If you’re not applying enough pressure when tamping, you will have channeling (water spraying through the grounds) and your expresso will taste sour. If you apply too much pressure, water will struggle to come through the grounds, and lead to over extraction and your coffee will taste bitter. The distributor and tamper combo can be adjusted to achieve a perfect tamp every time.
The Knock Box. I do own two of these. I like to switch them out depending on the vibe of the month. But, of course they do the same thing. Having a knock box at your espresso station is very much necessary in my opinion. It provides a place to discard and store your puck (coffee grounds) without any mess. Once the bucket becomes full, you can throw the grounds into your compost or throw them away.


Above are the 2 knock boxes I own and love. Obviously you only need one. From left to right, the black one is from a company called the coffee knock drawer company), linked here. The white knock box on the right is from another small brand called Crema coffee products. Most of my accessories are from Crema. They make accessories for most Breville espresso machines and I am obsessed with everything to come up with.
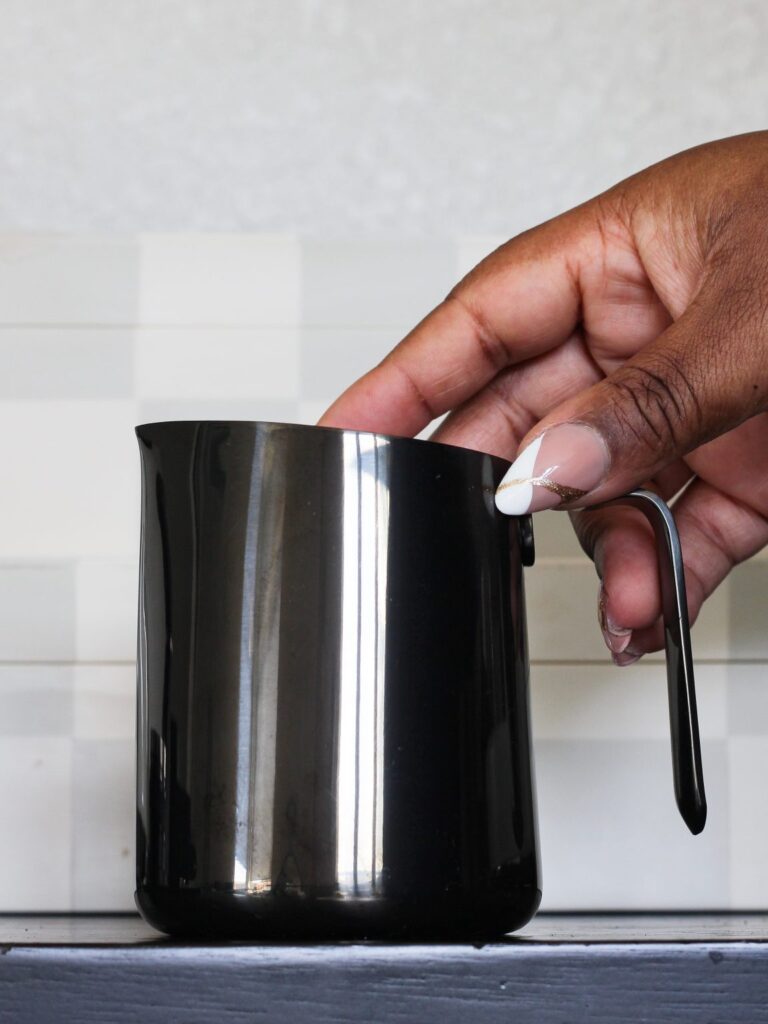
The Milk Jug/Steam Pitcher. Now, if you end up getting the barista pro, it does come with a milk jug. But, if you’re a beginner like me, I recommend something that is a bit more comfortable to handle. I really love the ”Eddy Steaming Pitcher” by Fellow. The spout is more fluted which allows for better precision when doing latte art. And the body is more tapered which makes it more comfortable. Plus this polished graphite finish is SEXY AF!
Now, if there is one comment I always get on my coffee content it’s ”Girl your mug is beautiful” or ”where did you get that mug?” So, below, I will leave links to a few of my faves and another link to my amazon store front where you can shop all my mugs and glassware by clicking on ”all things coffee” or ” cute glassware”.
SHOP A FEW OF MY FAVORITE MUGS:


Click for more info about Marin White Jumbo Mug + Reviews | Crate & Barrel Click for more info about Lira White Porcelain Footed Mug + Reviews | Crate & Barrel Click for more info about Black, White and Gold Geo Mugs Set Of 3 Click for more info about Moderno Coffee Mug + Reviews | Crate & Barrel
CLICK HERE TO SHOP MY AMAZON STOREFRONT.

Before we jump into making a cup of espresso, I would like to again leave a disclaimer that I am not an expert. I am always learning myself. With that said, this will not be a super detailed breakdown on how to dial in your coffee beans.. I’ll walk you through the process, but I wont be explaining every detail. So, if you would like to better understand the process, or if you are very new to making espresso, I HIGHLY recommend the Lifestyle Lab’s video on how to dial in your coffee on the Breville Barista Pro linked HERE.

One last thing I am super happy I did was changing the Steam Lever on my machine. I got this one from Crema and it was really easy to switch it out. Lifestyle Lab also has a great video tutorial showing you how to change the steam lever. Please bbe aware that changing the steam lever will void the warranty. For me, it is totally worth it. This lever looks way more high end and I haven’t had any issues so far.
NOW, LET’S GET INTO IT: HOW TO MAKE ESPRESSO 101

To begin, start your machine and let it heat up/prime. All of the Breville machines are very beginner friendly. But, in my opinion, the barista pro is especially great for beginners because of the digital display and built in grinder (with 30 grind steps).
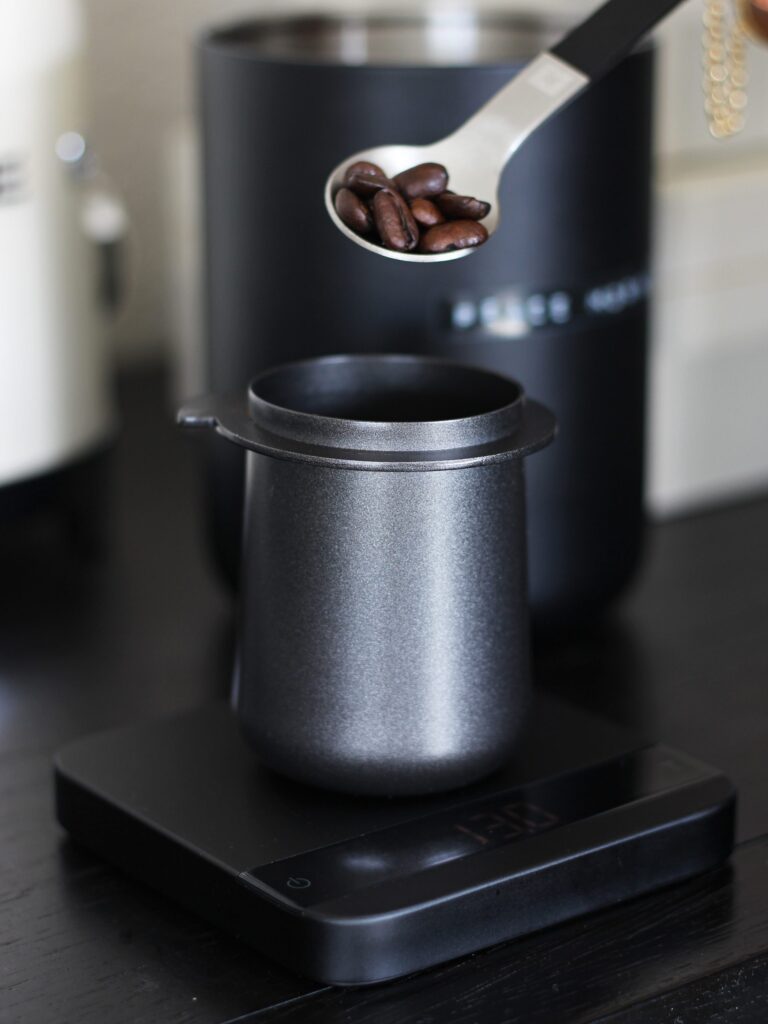
Next, you’re going to measure your dose using the dosing cup and scale. For a double shot, the weight of your dose should be between 14-18 grams. I have found my sweet spot and it is 16 grams (which will yield 32 grams of liquid). So the scale will be very important in your espresso making process. It’s essential when dialing in your coffee and achieving high quality espresso shots on a consistent basis.

The hopper on your Breville Barista Pro is designed to be an easy way to store your beans. So, when you are ready to make coffee just grind your coffee into the protafilter. But, storing your coffee in the hopper is not a great way to keep your coffee beans fresh. So I recommend storing your beans in a vacuum sealed container like the FELLOW storage canisters. Then measure out a single dose every time and then grind until the grinder is empty.
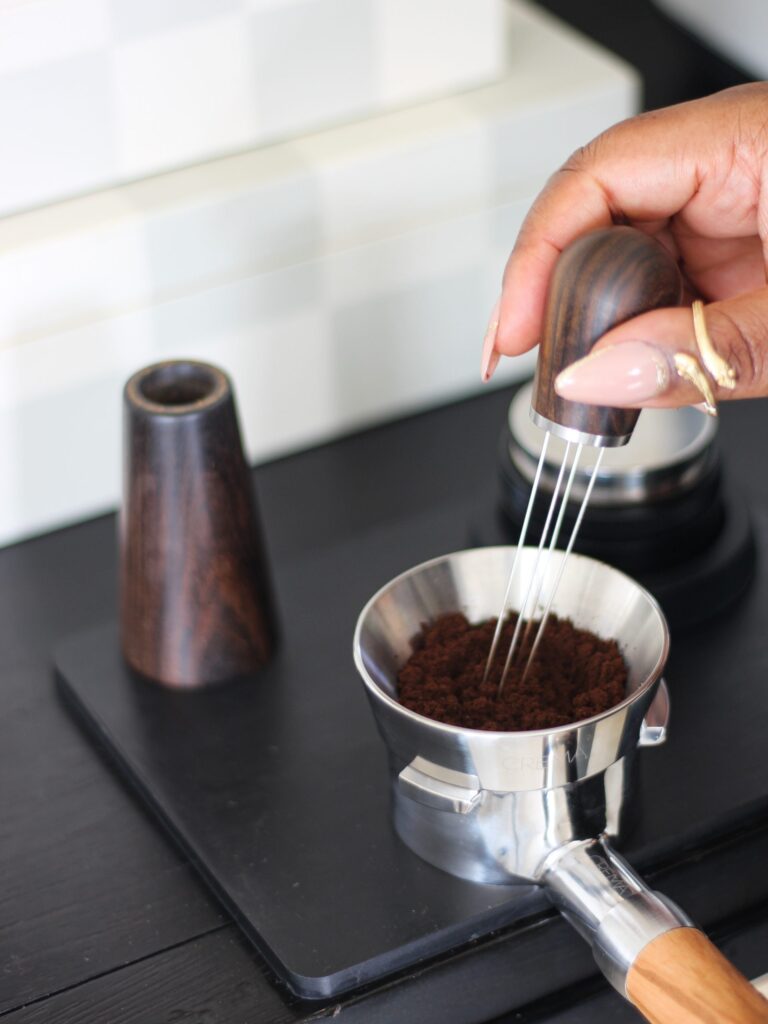
Now, use the WDT tool to break up any clumps in the grounds. Make sure the funnel is on of your protafilter so avoid a mess.

Use the distributor to level the grounds


Flip the distributor over and tamp your coffee grounds.

AHHHH beautiful

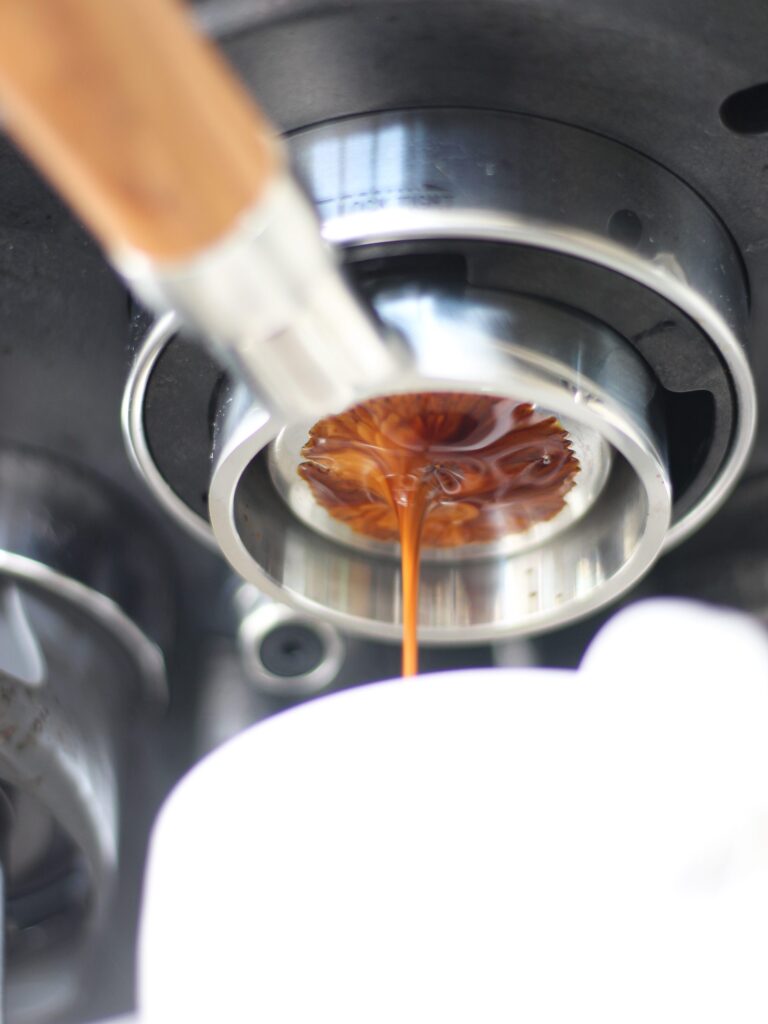

Ok, so you’ve prepared your shot, now it’s time to pull it. Set your coffee mug/cup onto the scale and zero it out. Put the machine into programming mode and push the double shot button. If you’re dialing in your shot for the first time and you’re using a bottomless protafilter, you want to look at your shot as it pulls to make sure there’s no channeling and your shot isn’t coming out too fast or too slow. Once the scale reads 32 grams (because our dose was 16 grams), press the double shot button again to stop the shot. An ideal brewing time for a good shot of espresso should be between 25-30 seconds.

Get rid of your puck into the knock box and clean the protafilter.
STEAMING:

Set your shot to the side and steam your milk of choice (This will take about 30 seconds after you practice a bit). Your barista pro does come with a steam wand and pitcher. As I mentioned before, I am not a big fan of the pitcher that comes with the machine because it feels more uncomfortable. However, the steam wand is fantastic for a machine at this level. It has 4 holes on the steam wand which allows for good steam power. There is also a little silicone handle one the wand so you can move it around without burning yourself.


Add the steamed milk to your shot and ENJOY! I’m still not great at latte art, but when I lock it down, prepare to be SICK OF ME.

And for those days when you don’t want to make espresso, CLICK HERE to get my dalgona coffee recipe
SHOP MORE OF MY FAVORITE ACCESSORIES:
- Wooden spoons that you see me use to stir my coffee in my IG and tiktok videos
- Smeg frother. This is a splurge, but it’s worth it if its in your budget. Especially on those days when you are too lazy to steam milk. Plus look at it. It’s GORGEOUS!
- Tamping mat to set your tamper, distributor, WDT tool on. I just ordered this and haven’t received it yet, but I think it’s stunning.
- Everyone needs a hand held frother. Especially if the smeg frother isn’t in your budget right now. This thing will froth your coffee, milks and matcha with ease.
- Coffee syrup bottles. I love having my syrups displayed. It’s pretty and convenient.
This milk carton style cup is just too cute and I had to include it. I love frothing my milks in there to complete the vibe. - Crystal honey jar. I mean it’s not necessary, but it’s just fucking gorgeous.
SHARE ALL THE VIBES ON PINTEREST:


Love it!!! What honey do you find works best in that jar?
I buy a local brand from my co-op. So any good quality raw honey works. The lid on the jar is a bit heavy, so it keeps the honey fresh for weeks. But make sure it’s pourable honey